User Administration
A user granted the "ServiceAdmin" role will be able to add users to their service. Once a user has been added, the roles they are given will then control what they can see and do within the service.
Adding a single user
A "ServiceAdmin" can add a user to the Service they are administering.
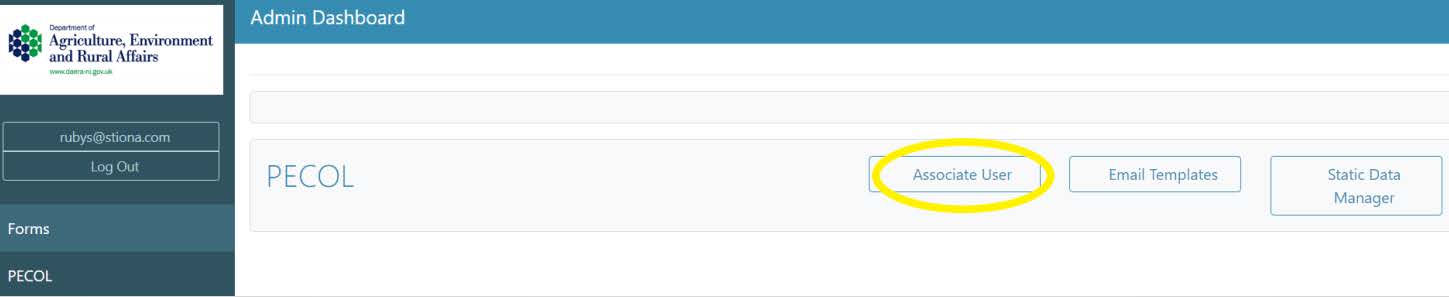
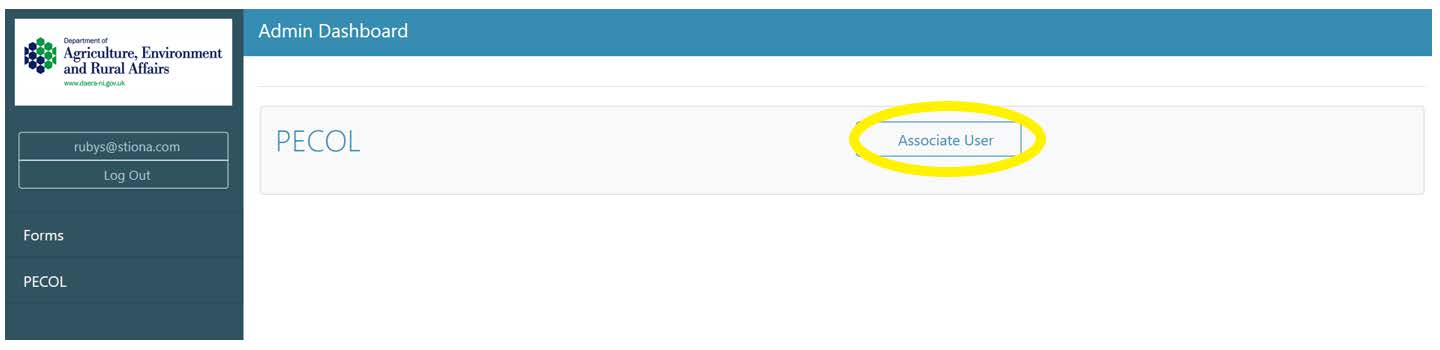
Click the ‘Associate User’ button associated to the service you wish to provision a user against – this will open the User Manager and display a list of users already provisioned within this service.

Click the ‘Add User’ button and fill in the user’s details. E.g. Staff ID
NOTE For NICS - the username must match the payroll number.
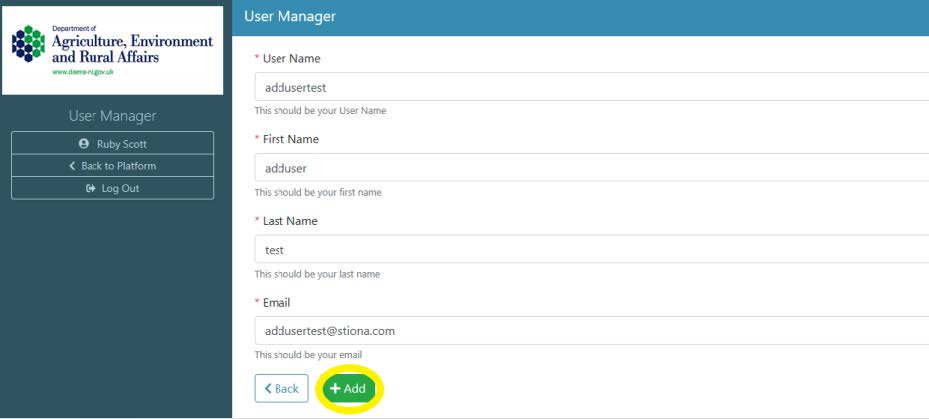
Click ‘Add’ to add the user to the Service. This new user is now known to the service and will be able to log in. They will be unable to perform any actions on the service until they have roles. The roles assigned will depend on the user’s job requirements.
Giving a user roles
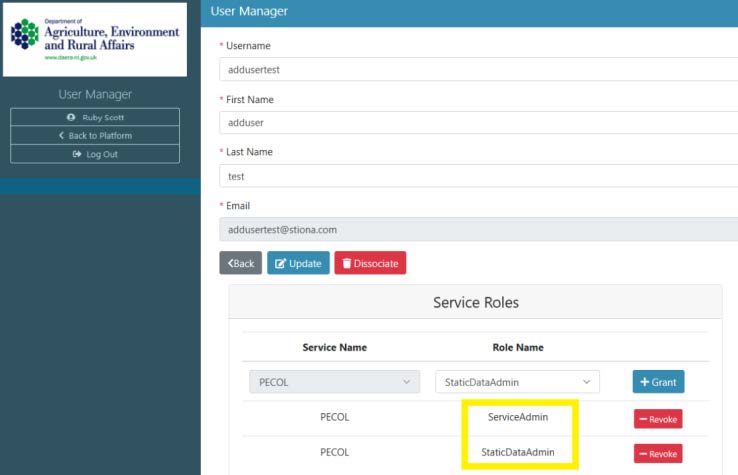
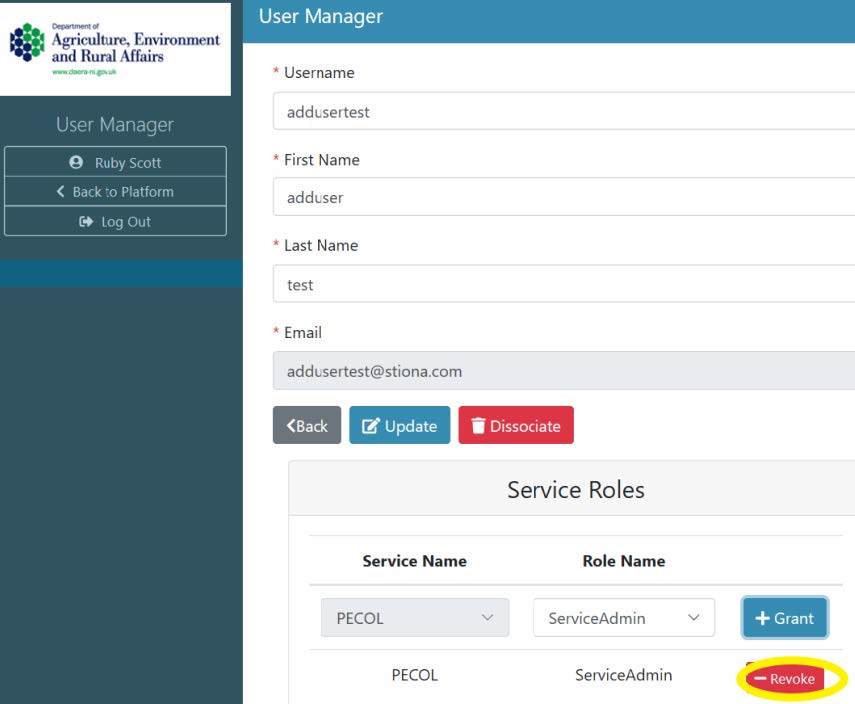
To grant a new user a role or to edit an existing user’s roles, click the ‘Edit’ button beside the user’s name to bring up the Service Roles available. Roles will be specific to the service name selected.
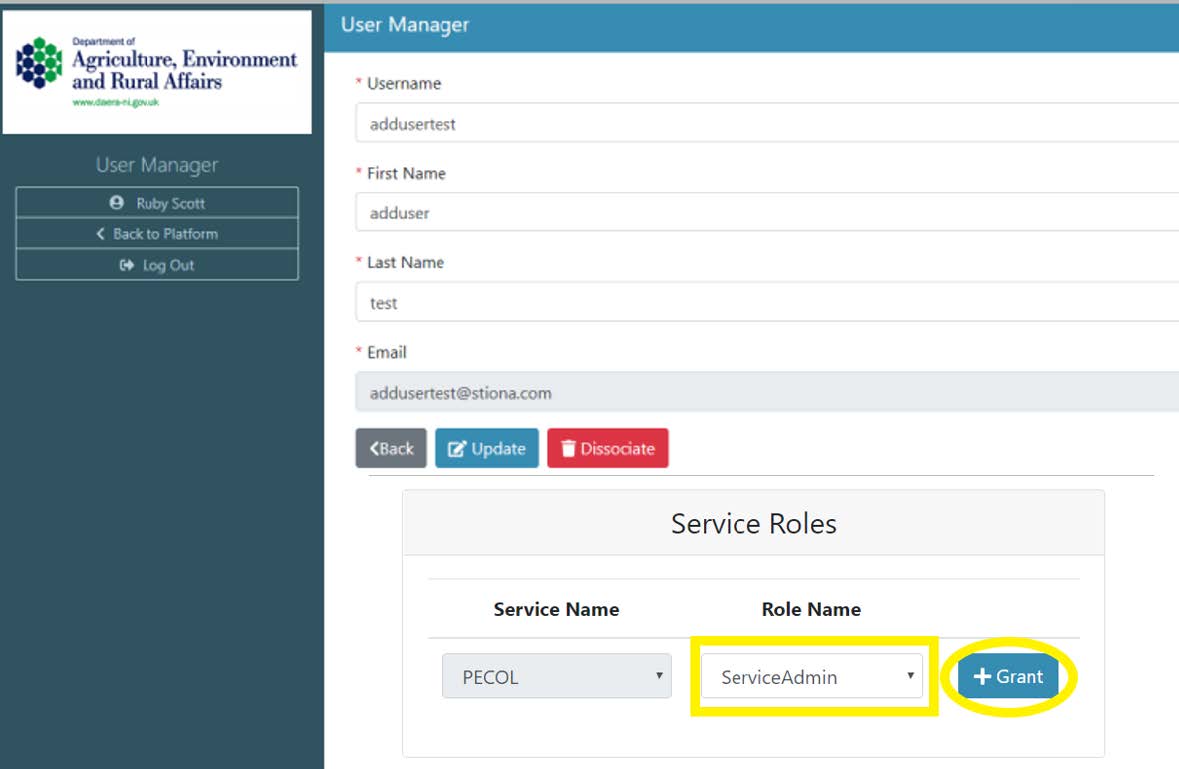
Clicking this button will display a drop-down list of optional roles a user can be granted. To grant a user a role, select the role and click the ‘Grant’ button. To remove a role from a user, click ‘Revoke’ button next to the role you wish to remove
Depending on which role has been granted to a user will determine what that user can view on their home dashboard. For example, a user that has been granted a ServiceAdmin role will be able to view the ‘Associate User’ button on the service they are provisioned against.
Upload multiple users
As with adding a single user, click the ‘Associate User’ button to enter the User Manager.
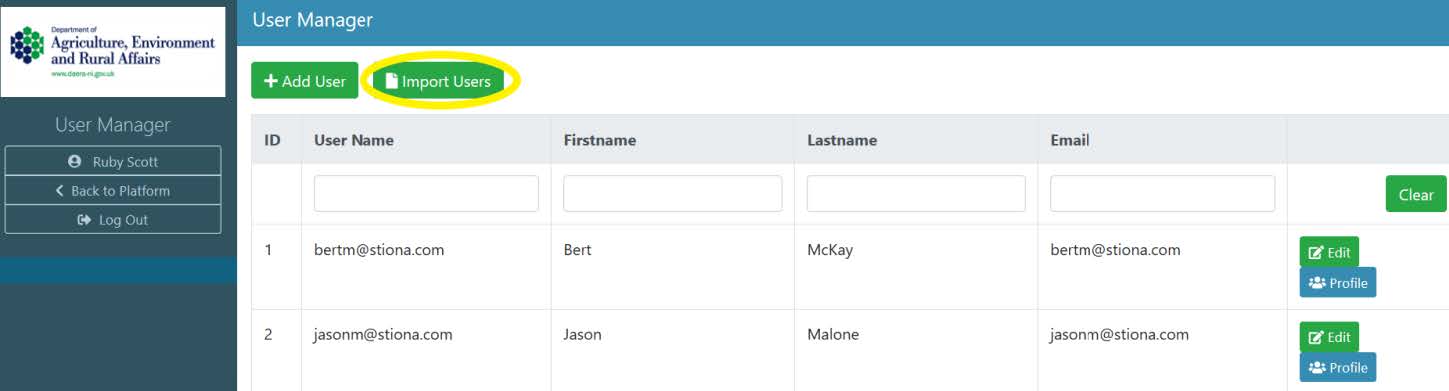
The ‘Import Users’ button will enable a user to upload multiple users to the service at one time along with the roles they wish to grant them. These users are imported from a pre-configured .csv file.

Note: the header row is important and a separate row is required for each role for a user – therefore a user may be listed multiple times where they are being granted multiple roles.
Click the ‘Import Users’ button to launch the User Import popup.
Click the ‘Browse’ button and locate your excel file
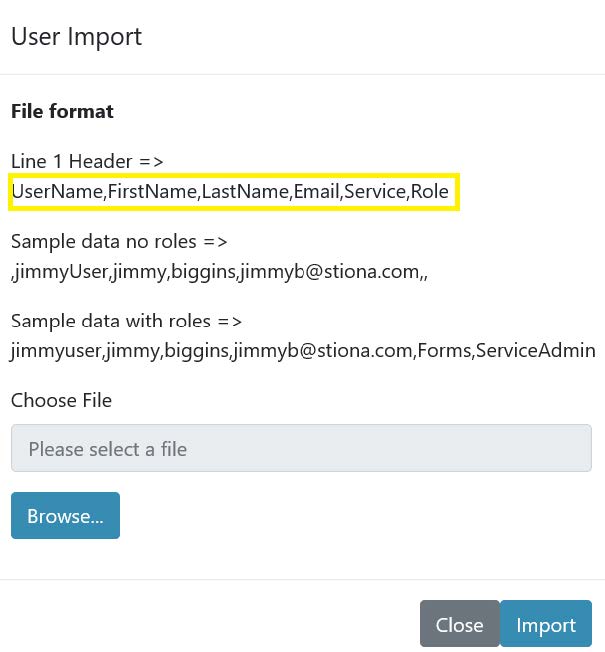
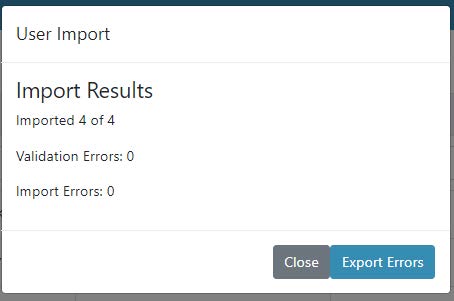
Then click the ‘Import’ button to complete the action. Once the import has completed, a status message will be displayed on the screen.
These users will now be displayed in the User Manager. Users can be granted multiple roles. E.g. a user can be created and granted roles as ServiceAdmin and a StaticDataAdmin.